
Why Great (and Not-So-Great) Drum Recordings Need Extra Depth
We’ve all been there: you’ve captured a great-sounding drum recording, but when it comes time to mix, it’s just missing that extra bit of size, width, and three-dimensional space. Or, even more common, you’ve received a recording from a band that tracked DIY style at home, completely skipped recording room mics, or tracked the drums in a small, dead, or bad-sounding room.
A common instinct is to start heavy-handed sample replacement, but that can quickly strip away the unique character and natural vibe of the original performance.
Fortunately, there is a way to get the best of both worlds. By using Slate Trigger 2 alongside the Kick Collection, Metal Snare Collection, and Wood Snare Collection, you can use samples exclusively for their ambient space. Here is a step-by-step breakdown of how to rescue a dead room—or augment a great one—while keeping your drum sound completely natural.
The Method: Triggering the Room
Instead of using a sample to replace the direct, dry sound of your drums, the goal here is to trigger only the acoustic environment they were recorded in.
Here is exactly how to set it up in your DAW:
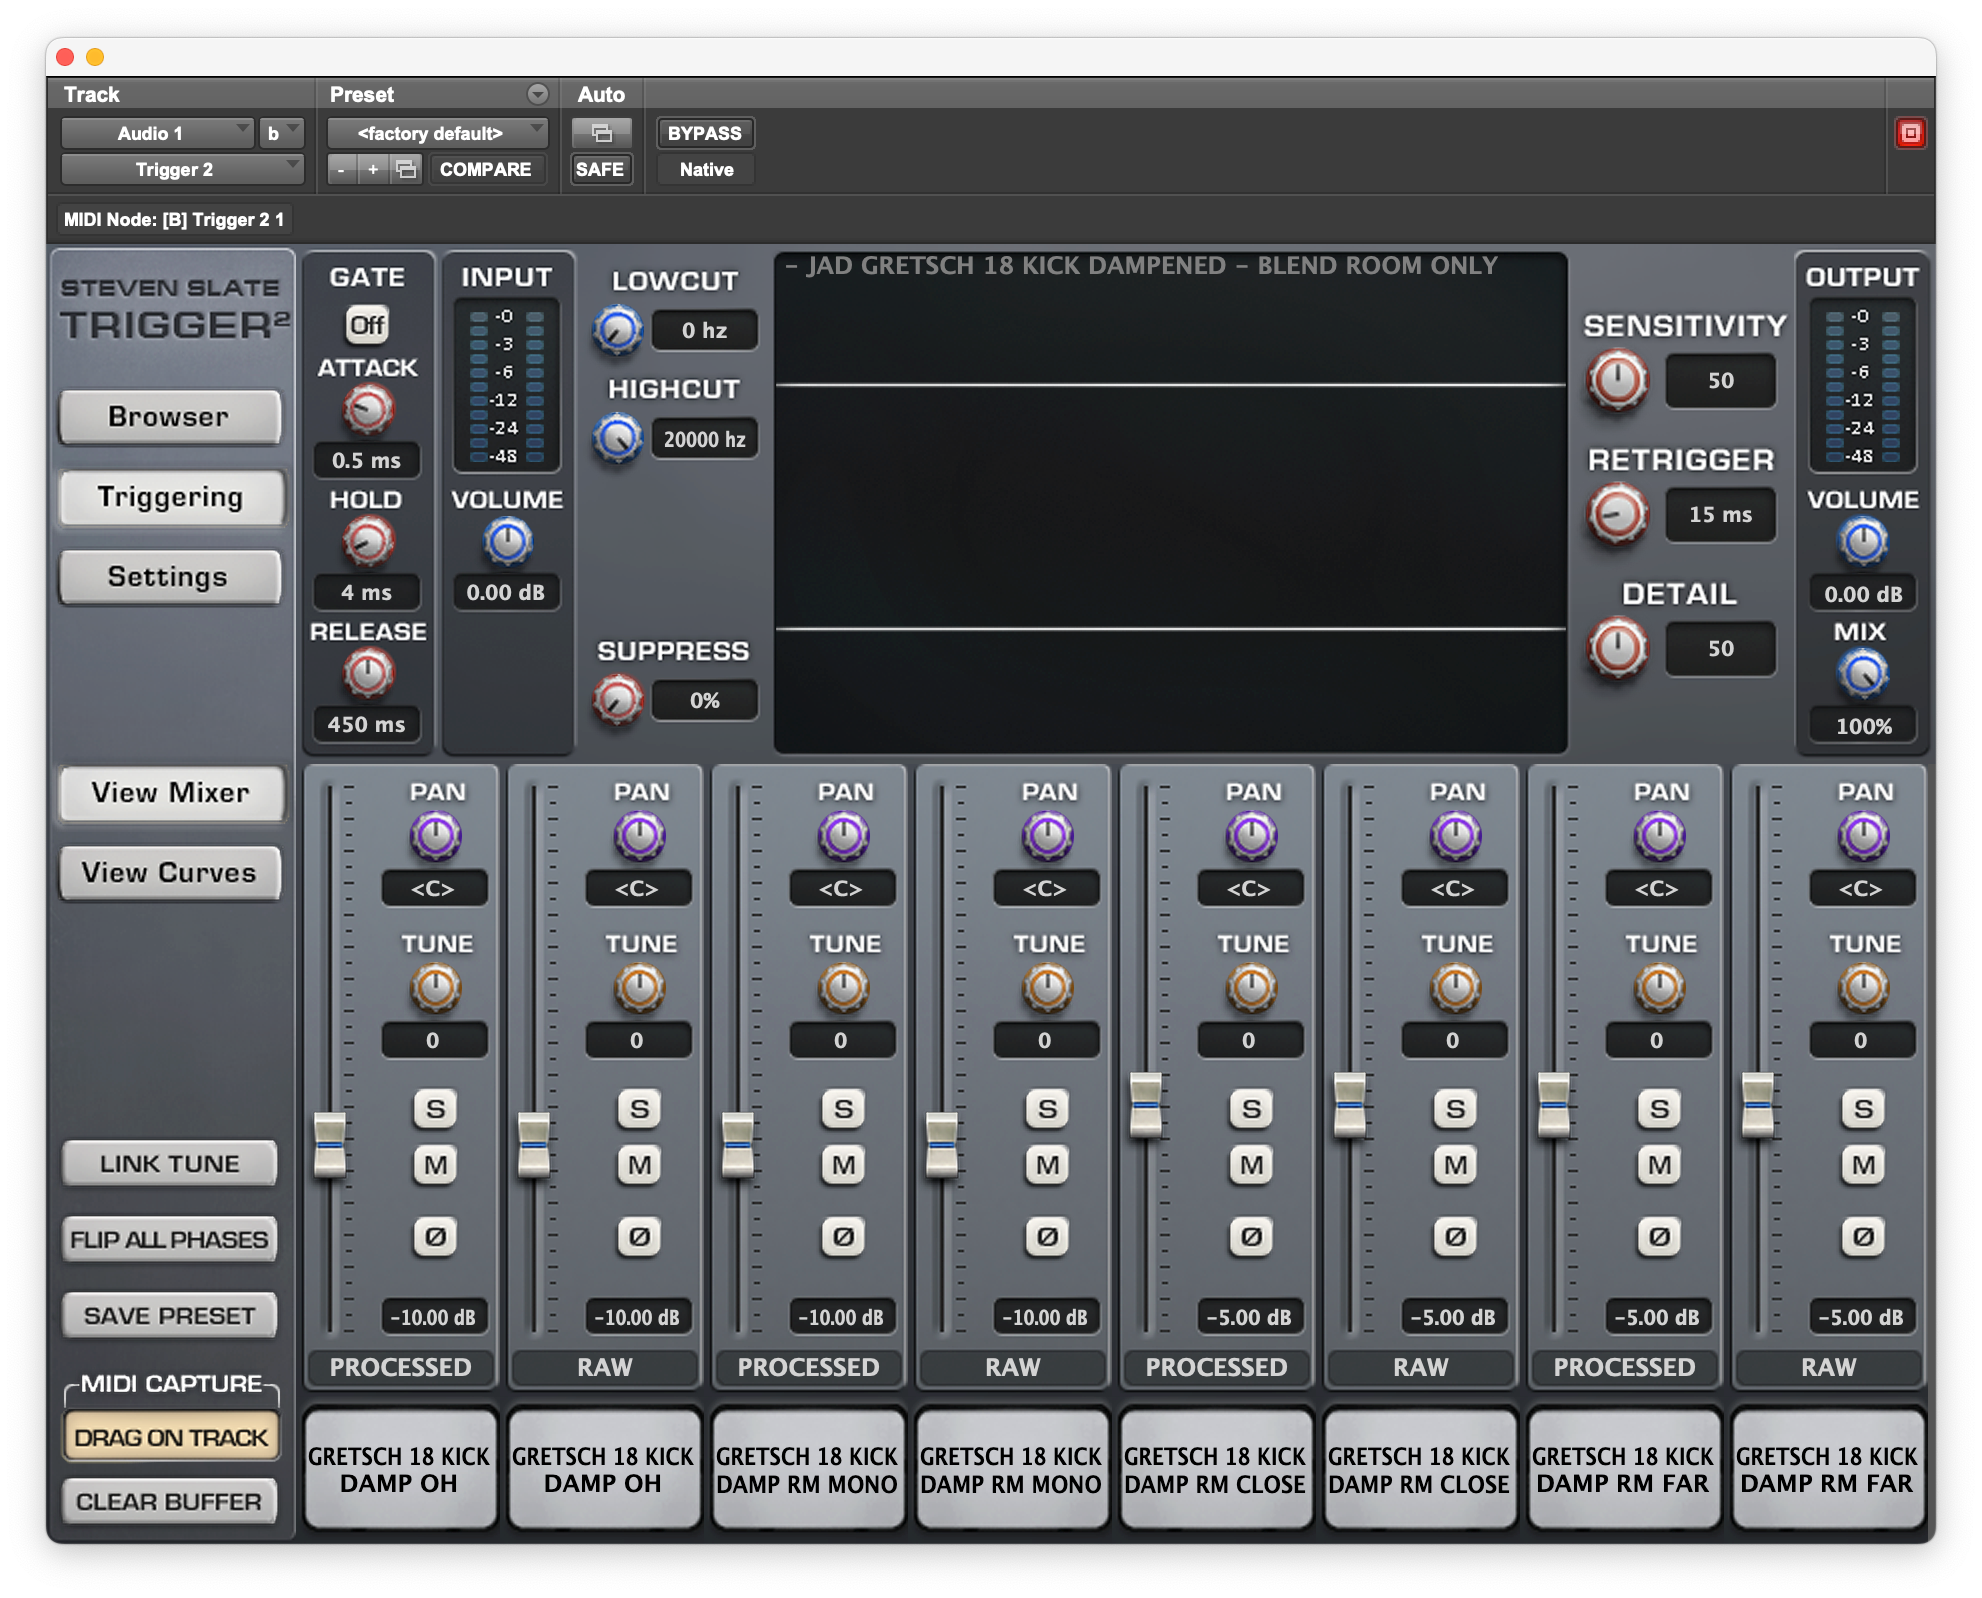
1. Route Your Trigger Channels
Create a brand-new audio or auxiliary channel in your session for your kick, and another for your snare. Load an instance of Slate Trigger 2 onto each. Feed these instances using either your original audio recordings or your existing MIDI data to ensure the plugin fires accurately in time with the performance.

2. Select the 'Room Only' Presets
Navigate into your sample libraries within Trigger 2. Instead of loading standard, direct drum samples, look for the dedicated ‘Room Only’ presets:
-
For the Kick: Load a 'Room Only' preset from the Kick Collection.

-
For the Snare: Choose a 'Room Only' preset from either the Metal Snare Collection or the Wood Snare Collection.

3. Blend and Balance
With the room samples triggering perfectly in time with your track, slowly bring up the faders on your new channels. Blend this simulated ambient space in with your original, dry drum recordings until you find the perfect balance.
Why This Technique Works So Well
Because you are completely bypassing the direct samples and only utilizing the room sounds, you aren't masking the original drum kit. Your final drum recording retains 100% of its natural tone and dynamics, but it is now supported by a massive, professionally recorded acoustic space.
Even better, you aren't locked into just one acoustic environment. While the Wood Snare Collection includes incredible 'Room Only' options, the Kick Collection and Metal Snare Collection take it a step further by offering a totally unique room configuration for every single drum in the library—giving you 10 completely different sounding room options per pack to perfectly match the vibe of your track.
Taking It Further: Pro Tips for a Bigger Sound
Once you have your room samples blended in, you can use these two processing tricks to completely transform the energy of your drum mix:
💡 Pro Tip #1: The Pitch-Shift Trick
Want an absolutely massive sound? Try lowering the pitch of your drum room samples. Dropping the pitch instantly alters the character of the space, adding serious weight, size, and a subterranean depth to your drum mix.
⚡ Pro Tip #2: Add Saturation or Distortion
If you really want your drums to stand out, try adding saturation or distortion directly to your triggered room channels. Driving the room samples introduces rich harmonics that make the drums sound even bigger and help them cut right through a dense mix.
Give this a try on your next mix, and see how easy it is to take a great drum recording and make it sound truly huge!

Share: